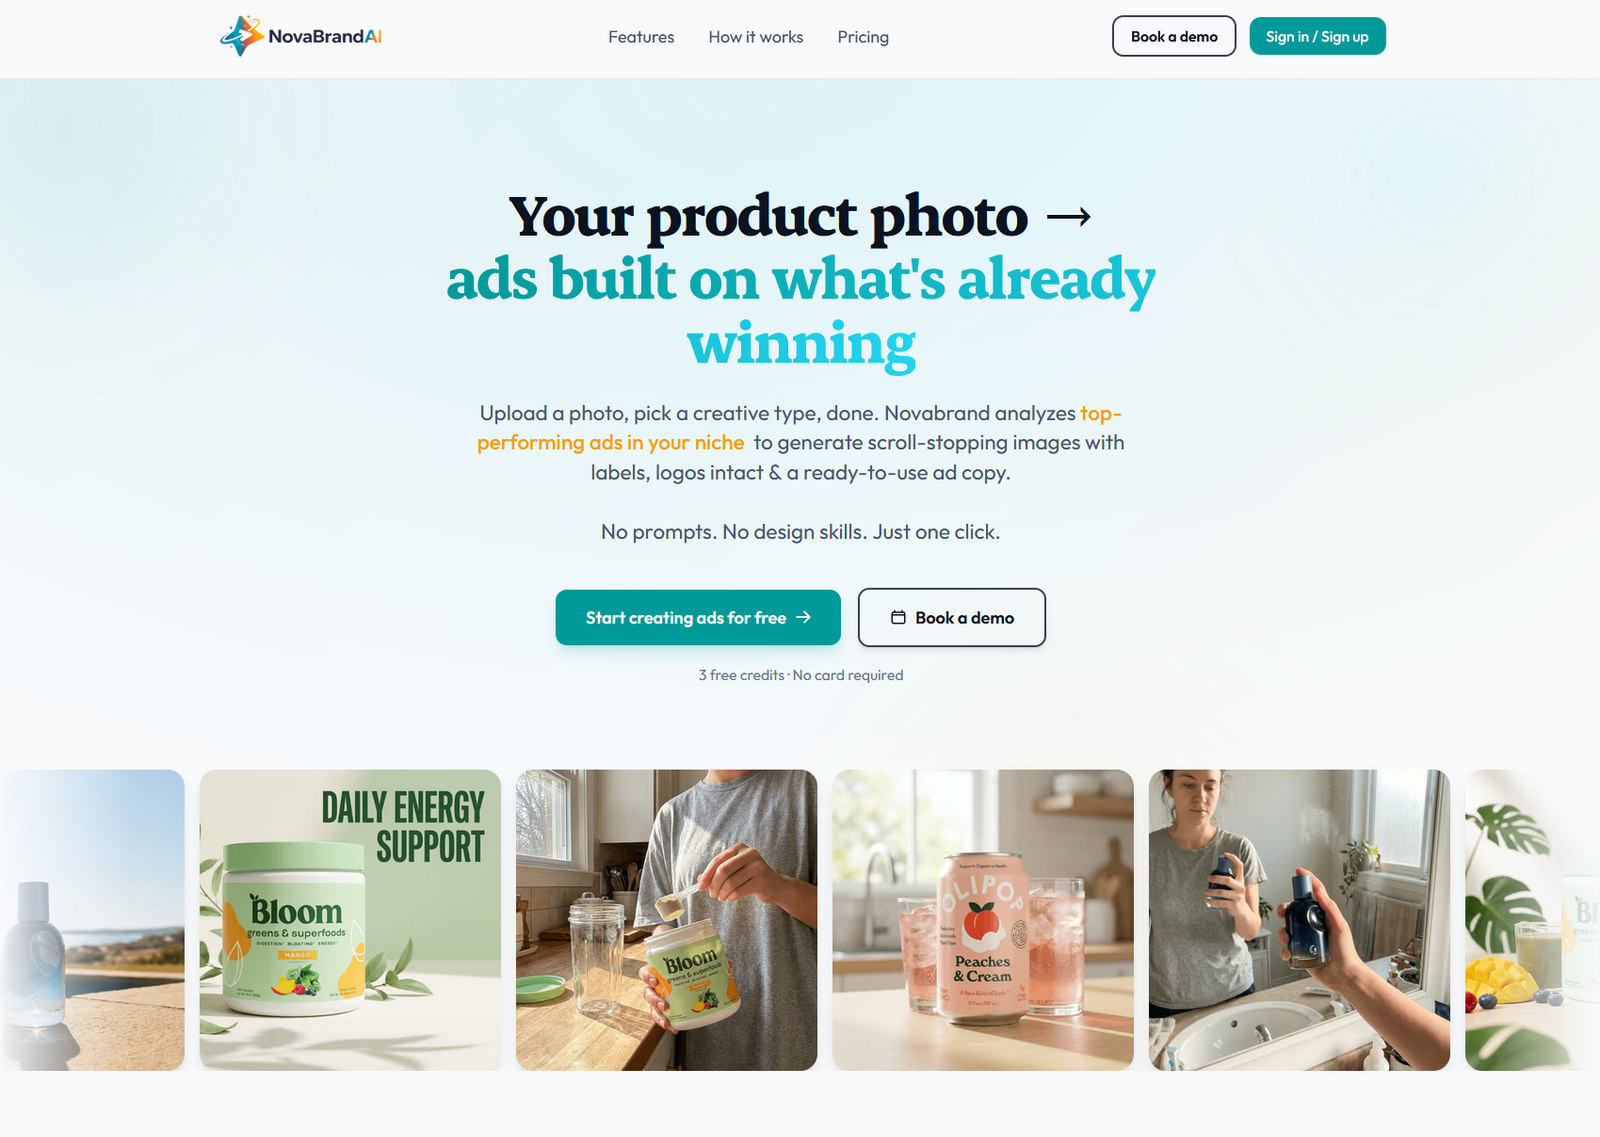
How to Create Product Photos With AI? (Full 2026 Workflow)

Goutham Jay
Founder - Novabrand.ai

A product shot taken on a phone can be changed to a Shopify-ready hero image in under 2 minutes.
In fact, today it turns out better than most of the studio work I was paying for 3 years ago.
AI product photography crossed the 'usefulness' line sometime in late 2024, and most ecommerce brands still haven't updated how they think about it.
This post is the workflow I wish someone had handed me when I was helping clients with their own store.
TL;DR: The 6-Step AI Product Photo Workflow
- Start with one clean product photo. Phone camera is fine. It's enough if you simply have good lighting. No need to worry about resolution.
- Set your brand profile once so the generator knows what you sell, who you sell to, and what your visual style is. This is what keeps every future shot on-brand.
- Pick the shot type whether that's a clean PDP hero, a lifestyle scene, a UGC-style image, or a full ad creative.
- Refine the image if you need any improvements
- Get the product photo in minutes instead of waiting for weeks.
That's it. The rest of the article is why each step matters and how to do it without the shots looking AI-generated.
Why AI Product Photography Works Now? (and Didn't in 2020)
2 things changed.
First, the models stopped melting logos and text.
Second, image generation got cheap enough to actually run batches instead of trying to get the prompt right.
When I started testing AI tools in early 2020, keeping a product label readable through a scene generation was basically a game of luck.
By the end of 2025, label-preserving models were at somewhere around 95% readable on the first pass.
That's the difference between "cool demo" and "I can run my store on this."
The second change matters more than people realize.
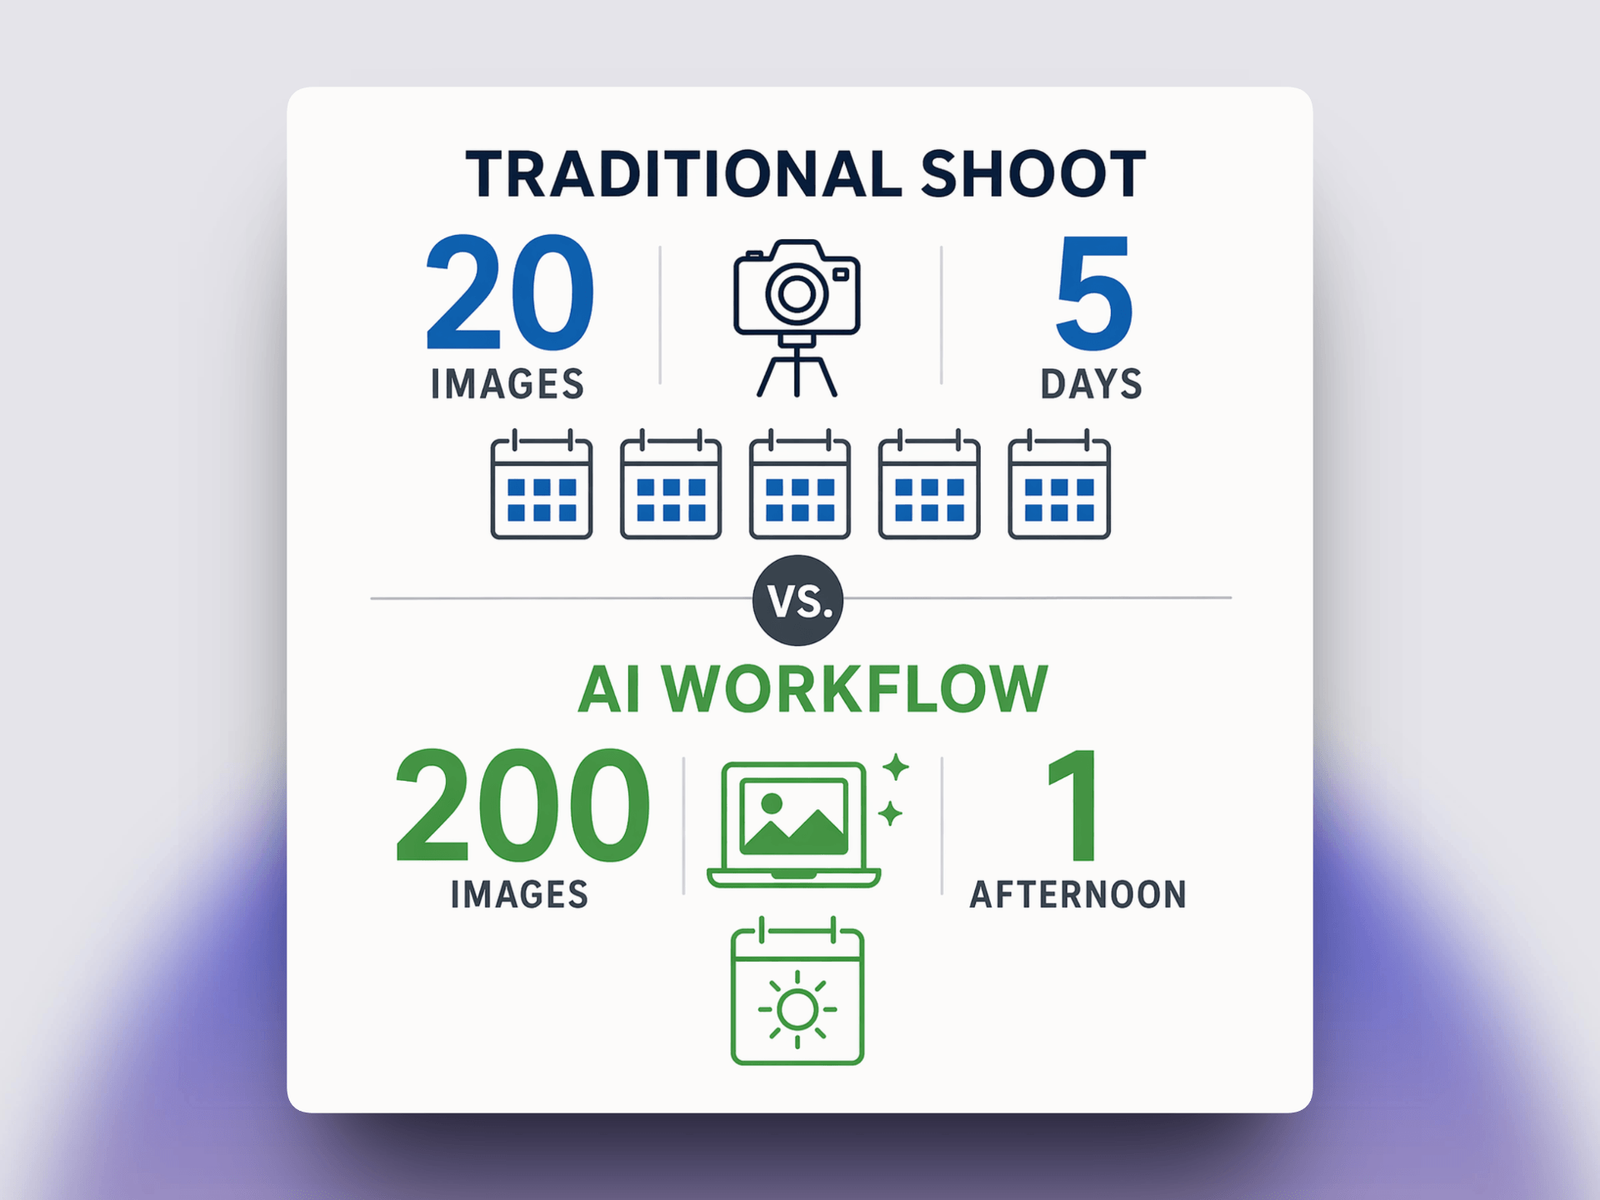
A professional product shoot produces maybe 20 usable frames. A modern AI workflow produces 200 in the same afternoon.
That isn't a small gain, it becomes a different kind of creative process.
You stop trying to get the perfect shot & can easily start selecting from a variety of decent shots.
According to Shopify's 2024 Commerce Trends report, 75% of shoppers say product images directly influences their purchase decision.
What's new is that the cost of meeting that bar is now close to zero.
What You'll Need Before You Start?
Most bad AI product photos come from a bad starting image or a vague idea of what the final shot should look like.
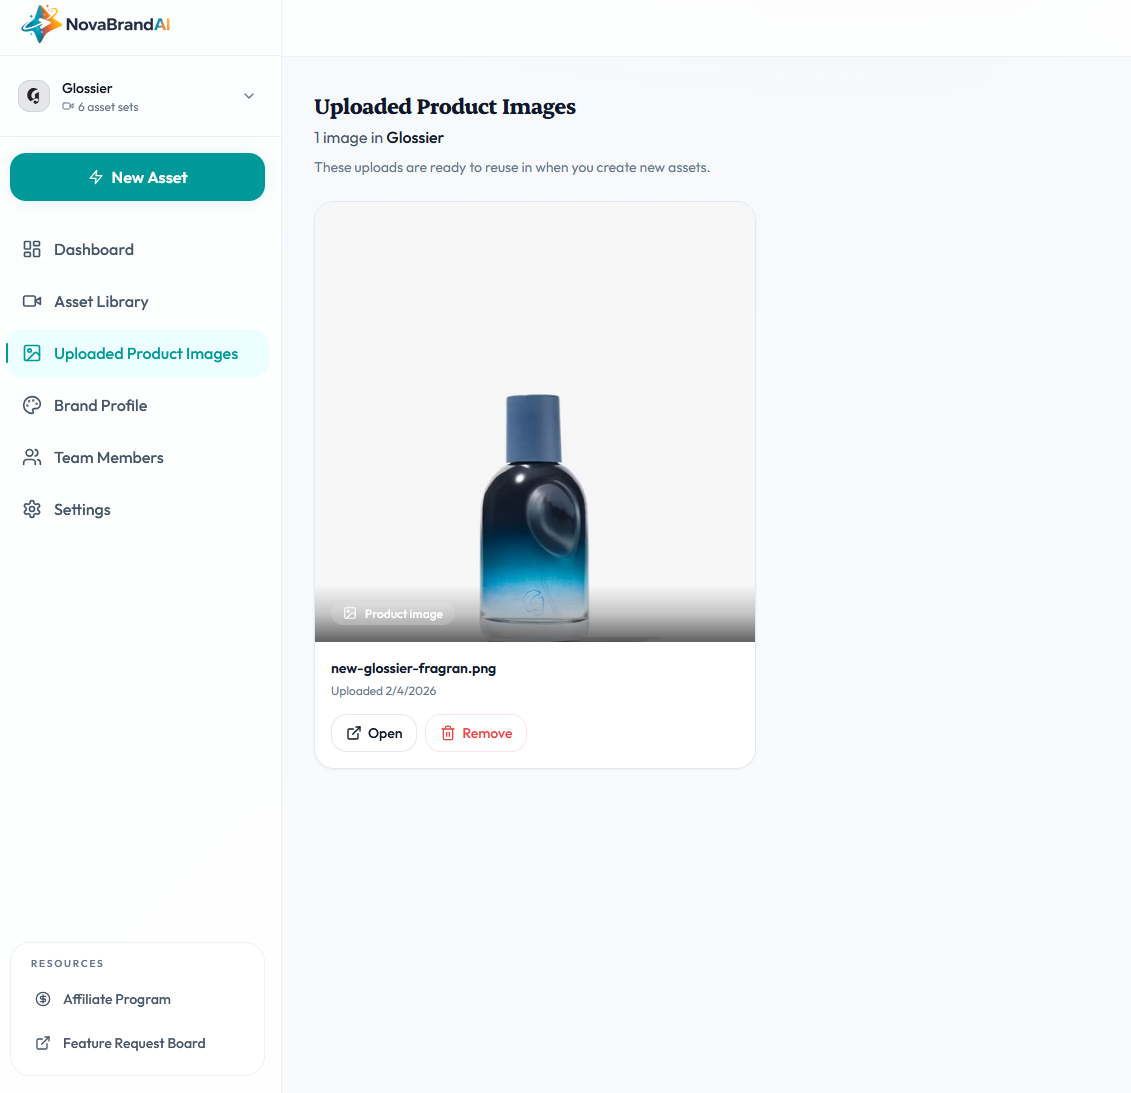
You need just 1 thing:
- One clean product reference photo. Shot on a neutral background, well-lit, product fully visible.
Step 1: Start With a Clean Product Photo
Well, it shouldn't come as a surprise that AI doesn't invent your product.
It takes your reference photo and places it into generated environments.
If your starting photo is blurry, poorly lit, or missing details, every generated shot inherits those problems.
The minimum viable product photo:
- Shot on white, gray, or neutral background
- Product in focus, no motion blur
- Even lighting - no harsh shadows or blown-out highlights
- Label or branding clearly visible
- PNG with transparent background is ideal, clean JPG is fine
Phone cameras after 2020 are all genuinely good enough.
I've shipped shots taken on an iPhone 12 to customer stores that are still running in ad campaigns.
What matters is the setup.
One tip that sounds obvious but most people miss: shoot the product at the angle you want in the final scene.
If you want a top-down flat-lay, shoot from above.
The AI will rotate and relight, but it handles perspective changes poorly.
Match the angle now and you'll get 3x cleaner results.
Step 2: AI gets your Brand Profile
This is the step that makes the difference between an okayish AI product image edit and an AI image that looks exactly like your brand.
Most AI tools let you type a prompt and get a shot.
Few let you lock in a persistent brand context across every generation. If you're serious about scaling like more than a few shots per month, you want the second kind.
When I built AI product photography tooling at NovaBrand, the first feature I fought for was a brand profile that every generation reads from.
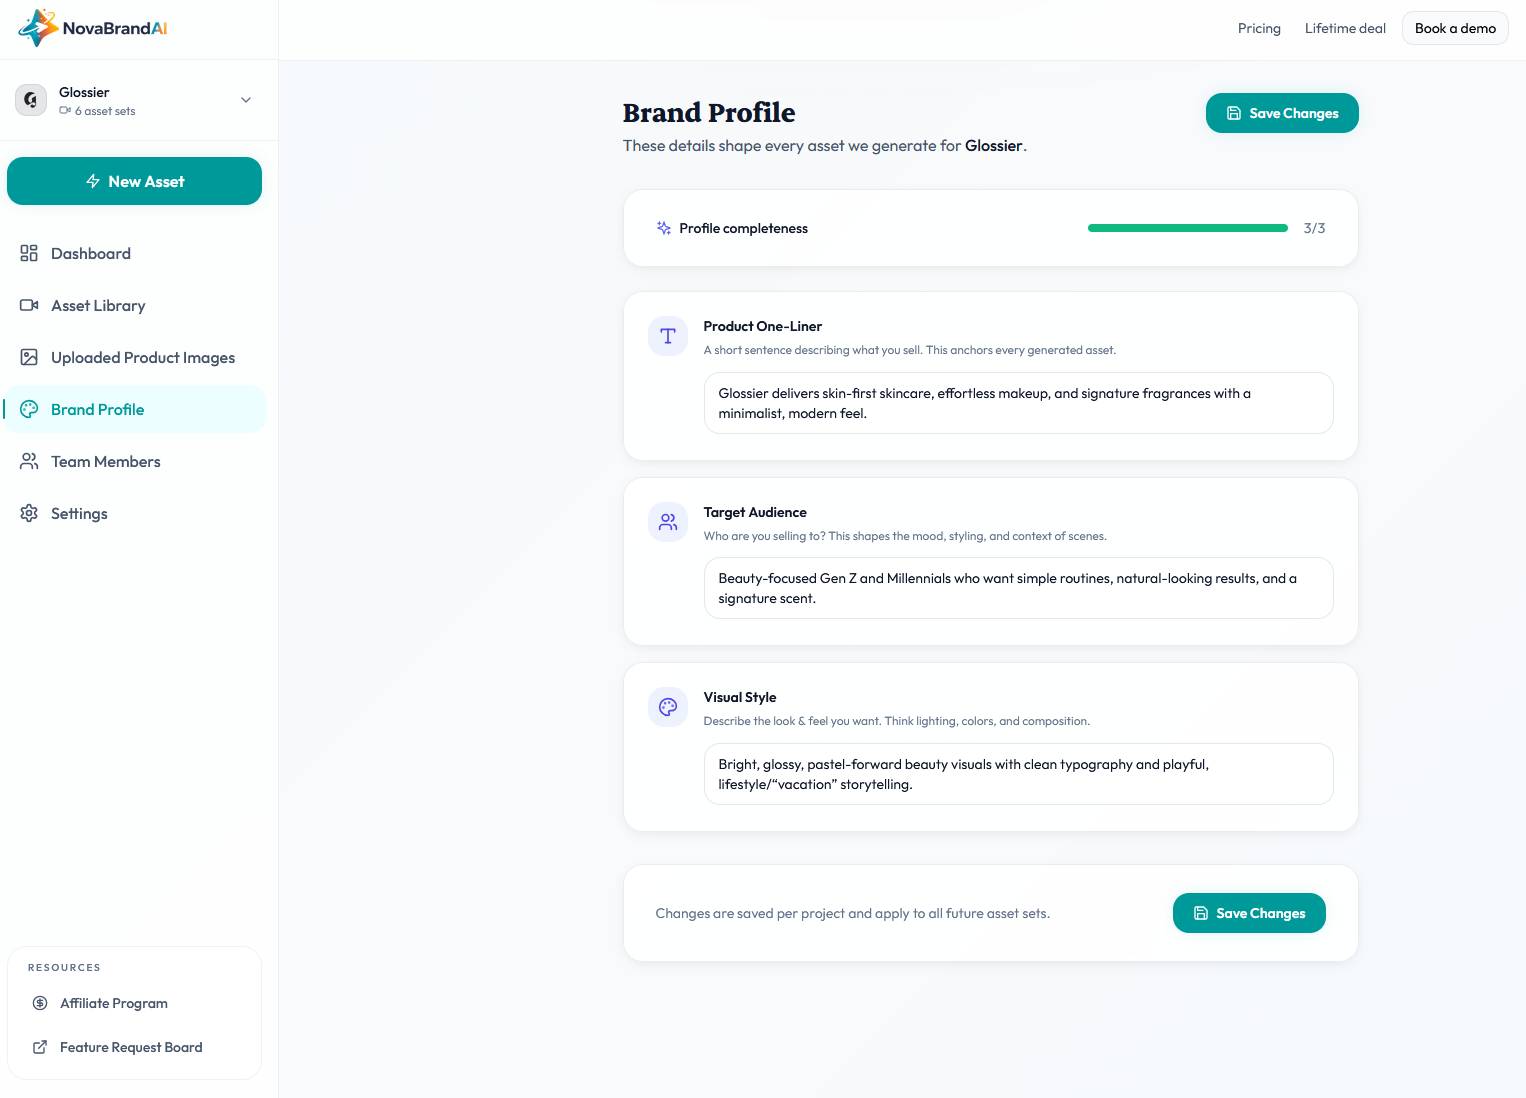
There are 3 fields in the brand profile:
- Product one-liner. "Premium organic skincare for sensitive skin." This keeps the generator from drifting into unrelated categories.
- Target audience. "Health-conscious women 25-40 who value clean beauty." This controls the age, styling, and mood of any human or room in the scene.
- Visual style. "Soft natural lighting, earthy tones, minimal props." This is the aesthetic control.
This gets automatically filled once you set your account. You can also edit this anytime you want
Every image you generate afterward gets quietly shaped by it.
After 10 shots, you start seeing a recognizable look.
After 50, you have a library that feels like it came from one photographer with one point of view.
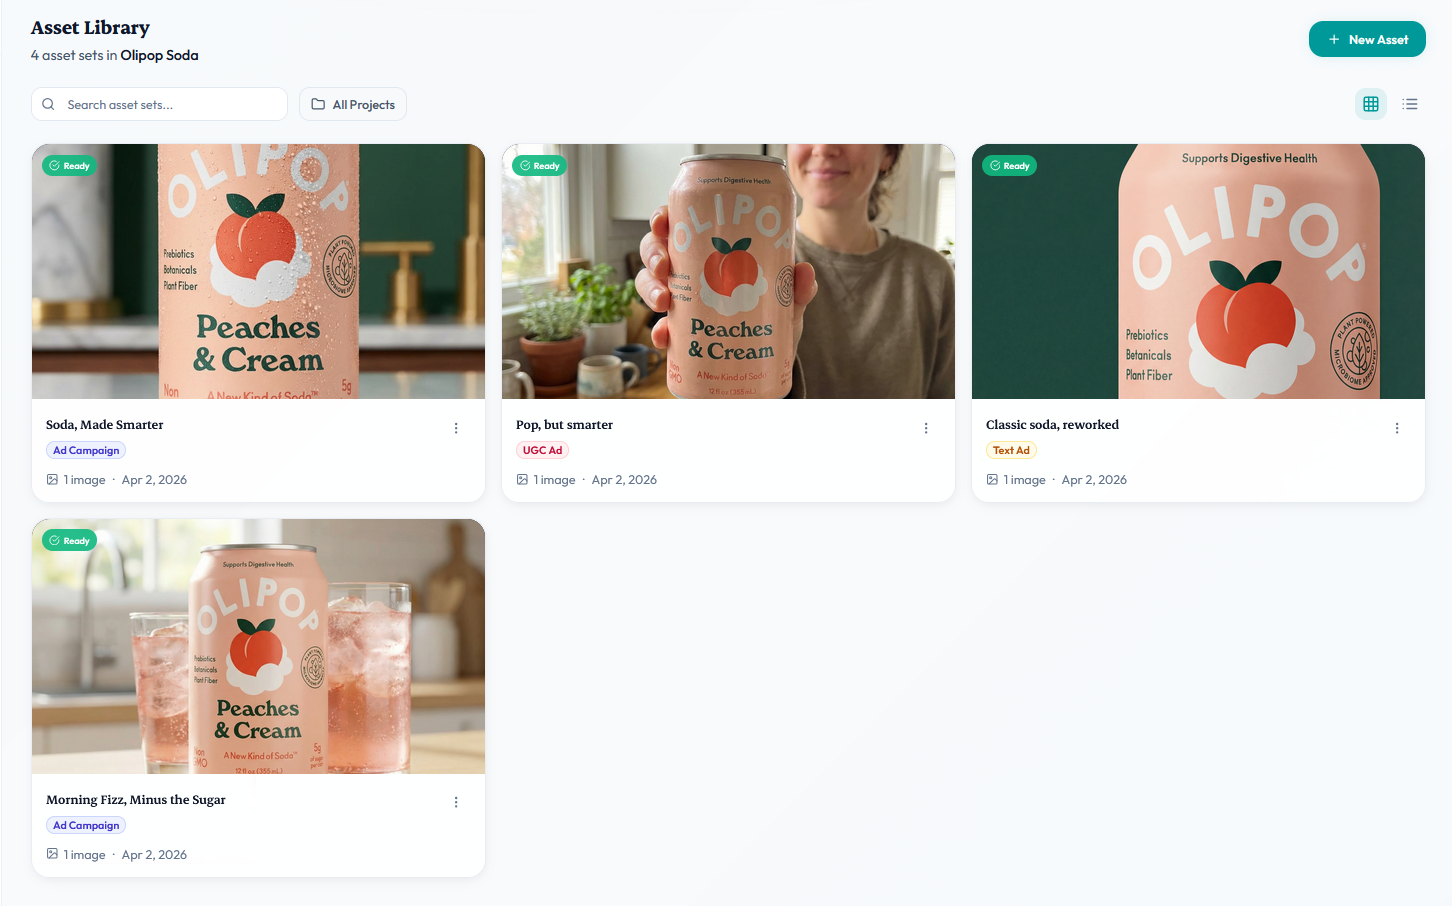
Step 3: Pick the Shot Type
Not all product photos look the same.
Here's the what you need to choose based on your use case:
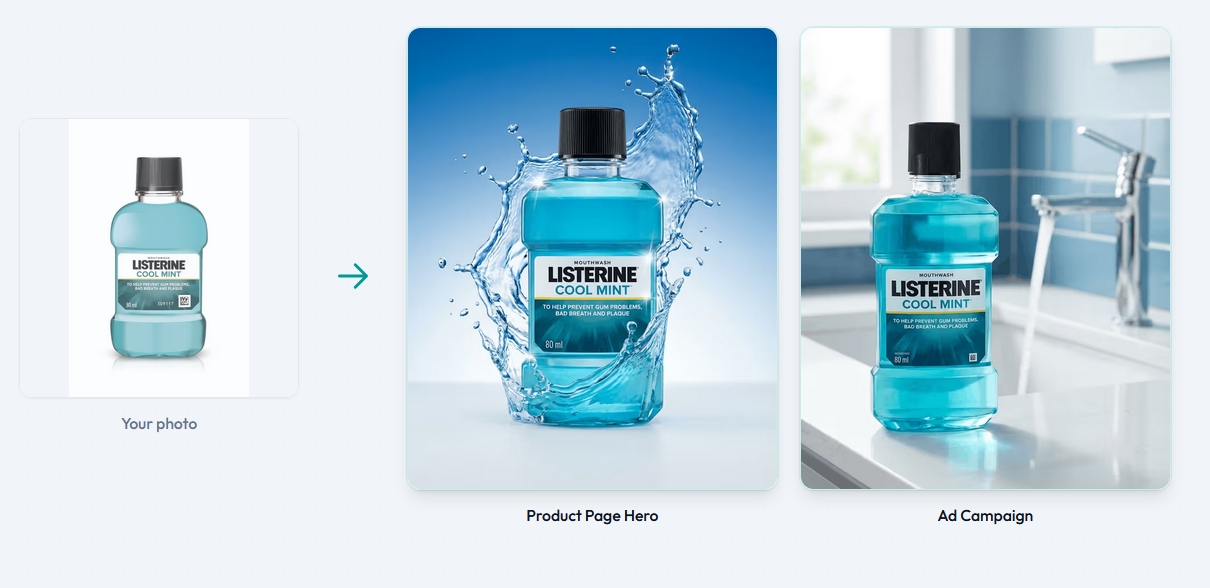
- Product Page Hero. Use For: Product listing pages, email, thumbnails
- Ad Campaign. Use For: Home page, "in use" context, brand content
- UGC-Style. Use For: Ads, social, authenticity-focused placements
- Image Ads with Text. Use For: Paid Meta/Google ads, with copy baked in

Each one has a different prompt recipe and a different tolerance for AI imperfections.
PDP hero shots are designed to be clean and boring as any visual distraction ruins the listing.
Lifestyle product shots tolerate more texture & are placed in a different background to give the customer a feel of how it looks in the real world
UGC is the best to create an impression. Human hands, faces, and body posture are created in the best possible way so that they enhance your product's social proof
Ad creative is its own sport.
If you're running Meta ads, you're not just making a pretty image and you're making a scroll-stopper with a hook.
I built a separate ad creative generator flow for this because the scene prompt alone isn't enough.

The generator looks at what's already winning in your niche and bakes those patterns into the output.
A pretty image that nobody stops scrolling for is still a bad ad.
Step 4: Refine the image if needed with a Prompt
This is the step most people waste the most time on.
The old mental model was "write the perfect prompt then hit generate."
You'd agonize over every adjective. Try to cram in every detail. Still end up with a mediocre result.
The new mental model is different.
Let AI do its job by generating the ad image by understanding your brand
Now look at what came back.
One of those images will be closer to what you wanted than the others. That's your anchor.
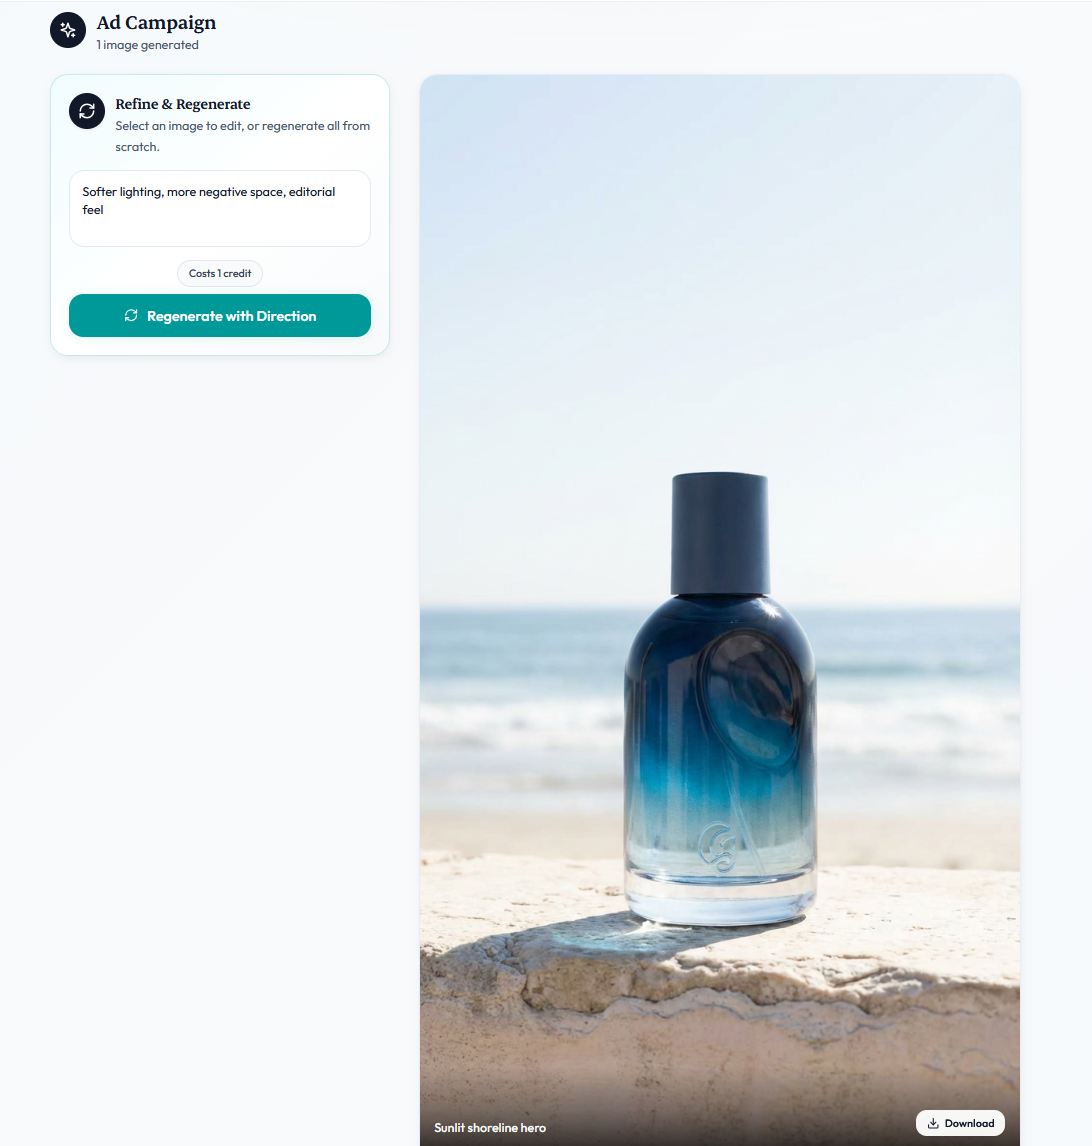
Instead of rewriting the whole prompt you tell the generator what to change about that specific direction in ordinary language:
eg. > Softer lighting, more negative space, editorial feel.
That's the whole input. Not a fresh prompt. A short creative direction that nudges the output.
Here as you can see i changed the image now to a different background with a very simple prompt & without complication
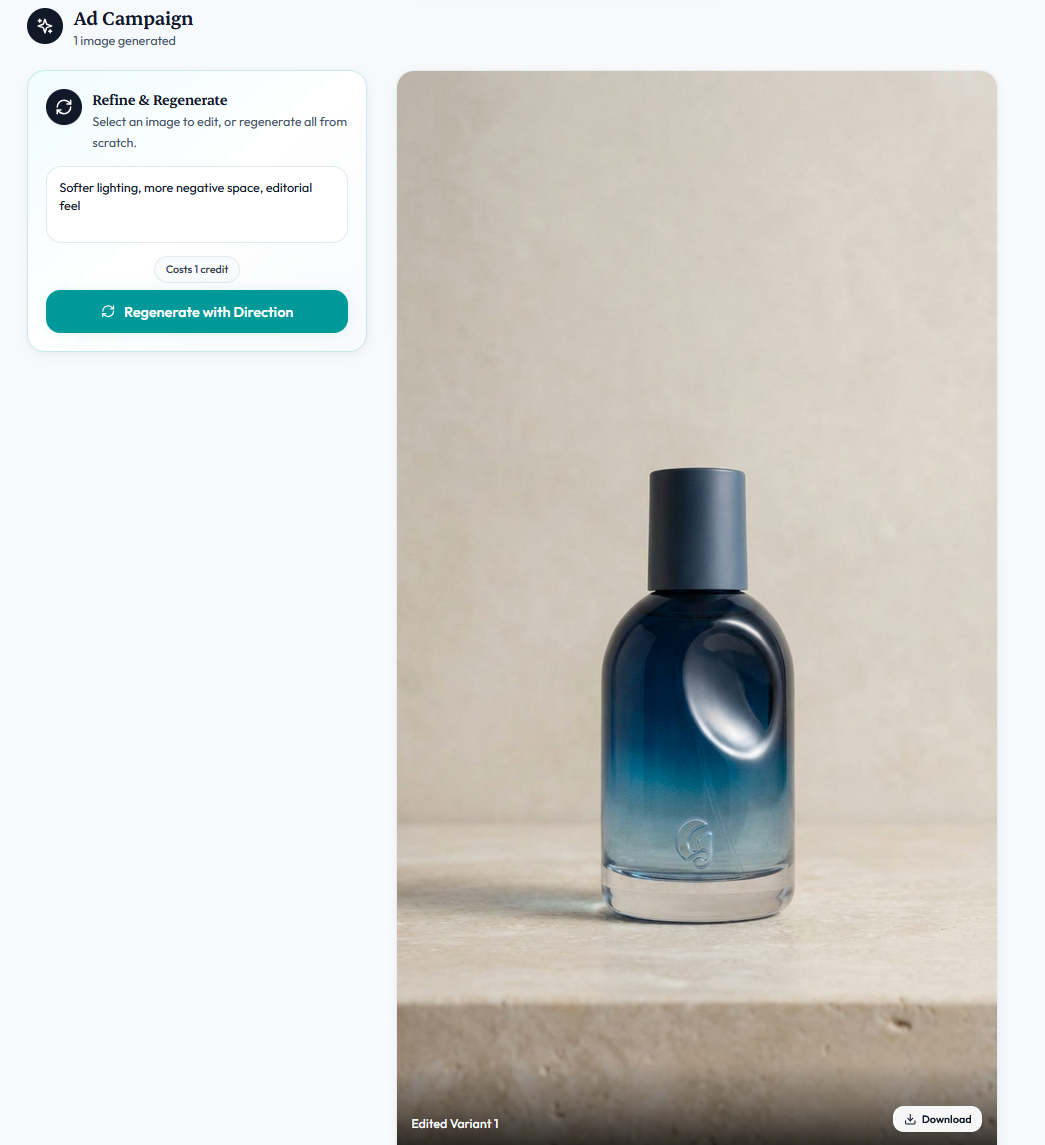
You can give a direction and regenerate the whole batch in that direction, or you can click a single image and give the direction for that one image only.
Editing a single selected image costs one credit.
Regenerating the whole batch costs the same as the original generation.
The default placeholder inside the refinement panel literally says "Softer lighting, more negative space, editorial feel" because that's the shape of direction the model responds to best.
Step 5: Generate a Batch, Not a Single Image
Old workflow: write prompt → generate 1 image → tweak prompt → generate 1 image → repeat.
New workflow: write prompt → generate 5 variants → pick the best two → move on.
Why this matters: AI image generation is still probabilistic.
The same prompt can produce different results each time.

A practical rule: for each scene idea, generate enough variants to see the range.
Usually 3–5 is enough
"Won't AI Product Photos Just Look Generic?"
This is the objection I hear most, and it's a fair one.
The honest answer is that they will look generic if we treated AI like a vending machine.
But Novabrand takes the guessing out by getting you a brand profile and analyzing winning ads
- Lock in a brand profile so every shot shares a consistent visual DNA.
- Shoot your own product reference photos instead of using stock-style angles.
- Winning ads analyzed instead of doing a guesswork
Brands can run entirely AI-generated ad libraries that look more cohesive than their previous studio work, because the studio work was spread across three different photographers over 2 years and the AI work was built on one locked-in brand profile.
Consistency is underrated. AI is shockingly good at it if you set it up correctly.
The brands whose AI shots look generic usually haven't done any of the three steps above.
They're comparing their untuned AI output to someone else's polished studio library.
How Long Does All This Actually Take?
For someone who's done it a few times, the full workflow for a new product looks like:
- Product photo capture (if needed): 10 minutes
- Brand profile setup (one-time per brand): 1 minute
- Batch generation of 5 variants: 2 minutes
- Refinement & selection: 2 minutes
- Export to store/ad account: 2 minutes
Call it 17 minutes end-to-end for a finished shot the first time through. A 100 production-ready images in a focused afternoon is a realistic target rather than an aspirational one.
FAQ
Do AI product photos actually convert in ads?
AI-generated ad creative perform for ecommerce categories performs better on cold traffic because of the iteration volume.
The win isn't that AI images convert better per-impression. The win is that you can test 50 variants in a week instead of 5.
Can I use AI product photos on Amazon?
Yes, with one caveat: Amazon's terms require the main listing image to be on a pure white background, and the product must accurately represent what ships. Novabrand's PDP style images work really well for this case
What if my product has fine details - like jewelry or watches?
This is where Novabrand AI stands out. It maintains finer details in the product without any obstruction.
Do I need to know how to write prompts?
Not required. The AI image generator in Novabrand handles this entirely by itself
Wrapped
The workflow is not complicated.
Start with a clean product photo.
Generate batches, not singles.
If you want to try the exact workflow this article describes,
NovaBrand's pricing starts at free-to-try - see current plans and everything above can be done in the first session.